
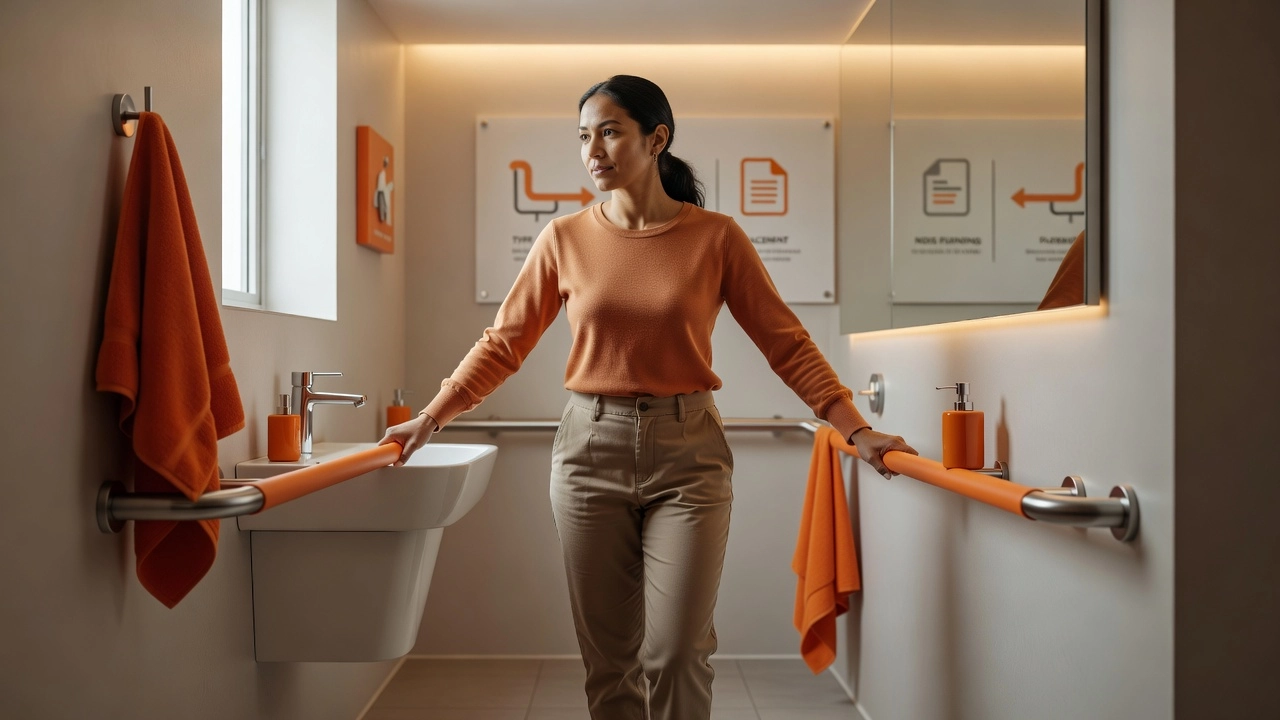
Every year, thousands of Australians experience bathroom falls that result in serious injuries. For people living with disability, illness, or age-related mobility challenges, the bathroom can be one of the most hazardous spaces in the home. The good news is that a simple, well-placed solution can dramatically reduce this risk: bathroom handrails.
Whether you are exploring safety modifications for yourself or a loved one, understanding your options is the first step toward creating a safer, more independent living environment. Bathroom handrails come in a variety of styles and configurations, and knowing which type suits your needs, where to position them correctly, and how to fund the installation can feel overwhelming at first.
This guide breaks everything down in a clear, straightforward way. You will learn about the different types of bathroom handrails available, the recommended placement guidelines for maximum safety and accessibility, and how the National Disability Insurance Scheme (NDIS) may be able to help cover the costs. By the end, you will have the confidence and knowledge to take the next step toward a safer bathroom setup.
Types of Bathroom Handrails
Not all bathroom handrails are the same, and choosing the wrong type for a specific location or user need is one of the most common mistakes made during accessibility upgrades. Here is a breakdown of the main types you will encounter.
1. Grab Rails The most common type. Grab rails are fixed directly to wall framing or a solid substrate and come in straight, angled, and L-shaped configurations. A straight horizontal rail suits shower back walls and toilet side walls, supporting balance during standing. A vertical rail works best at shower or bath entries, helping with lateral step-overs. An angled rail handles both downward and upward forces, making it effective at toilet transfers. According to patient safety guidance on bathroom grab bars, correct placement and orientation directly determines how much load the rail can safely absorb.
2. Modular Grab Rails Modular systems are adjustable and reconfigurable, making them well-suited to NDIS participants whose mobility needs may change over time. Rather than committing to a fixed configuration, these systems can be repositioned as a person’s condition evolves.
3. Banister Rails Banister or corridor rails run continuously along a wall, providing support across a longer travel path rather than at a single point. These are typically specified for hallway approaches to a bathroom.
4. Timber Handrails Timber rails offer a warmer, more residential finish, which matters when a homeowner wants accessibility without an institutional look. They must still comply with AS 1428.1 load and dimensional requirements regardless of material. For more on selecting between standard and designer options, this practical guide on grab bar selection is worth reviewing.
5. Choosing the Right Type The correct choice depends on location, the user’s grip strength, and their specific mobility pattern. Whether the work is NDIS-funded or self-funded also shapes the decision. A formal Occupational Therapist assessment will determine exactly what type, height, and orientation is appropriate before any installation begins.
Where Should Bathroom Handrails Be Installed?
Knowing you need a handrail is one thing. Knowing exactly where to put it is another. Placement determines whether a rail actually prevents a fall or simply looks like it might. Here are the five locations that matter most.
1. Beside the Toilet
The toilet is one of the highest-risk transfer points in any home. Sit-to-stand transitions place significant load through the upper body, and without a stable anchor point, that movement becomes a genuine fall risk. A horizontal or angled rail positioned on the dominant-hand side gives the user a reliable push point, distributing force more naturally through the stronger arm and reducing the risk of losing balance mid-transfer. Per Australian safety guidance on grab bar installation, a horizontal bar should sit between 680 and 820 mm above the floor. Flip-down rails are worth considering in compact bathrooms, as they fold flush against the wall when not in use.
2. Inside the Shower Recess
Shower areas are consistently identified as high-risk due to wet, soapy surfaces combined with the physical demands of stepping over a threshold or maintaining balance on one leg. A vertical or angled rail at the shower entry gives users something solid to grip when stepping in and out. A separate horizontal rail along the shower wall supports balance during washing. For seated shower users, rail height should account for the shower chair position; for standing users, approximately 1000 mm from the floor is a practical reference point.
3. At the Bath Entry
Baths present a different challenge. Lowering into and rising from a bath requires significant knee and hip mobility, which many older adults and people with physical disabilities find difficult or painful. An L-shaped or vertical rail mounted at the bath edge provides a stable handhold for both phases of that movement. The rail needs to be anchored into structural framing, not just the wall surface, to bear the load safely.
4. Along the Hallway Approach
Falls do not only happen at the fixture. The travel path from bedroom to bathroom, particularly at night, carries its own risks. A continuous wall rail or banister running from the hallway to the bathroom entrance creates an uninterrupted support chain across the full journey. This is especially relevant for users with balance conditions or those recovering from surgery. As outlined in guidance on choosing grab rails and handrails for elderly safety, handrails serve a different function to grab rails; they are designed for continuous grip across a longer movement path, not just a single transfer point.
5. Compliance With AS 1428.1
Placement is not guesswork. AS 1428.1 specifies height ranges, lateral clearances, distances from fixtures, and structural load requirements including the ability to withstand 1,100 newtons of force from any direction. An OT assessment identifies the individual’s functional needs; a licensed builder’s site assessment confirms what the structure can support and what the standard requires. Both inputs are necessary. One without the other leaves gaps, either in function or in compliance.
Australian Standards and Compliance: What AS 1428.1 Requires
If you are installing bathroom handrails in Australia, one standard sits above the rest: AS 1428.1, Design for Access and Mobility. Published by Standards Australia, this standard sets the technical requirements for grab rail dimensions, heights, load-bearing capacity, grip specifications, and clearances in accessible bathrooms. The most current version is AS 1428.1:2021, which replaced the 2009 edition and was formally incorporated into the Disability (Access to Premises) Standards in November 2024. If your project involves NDIS funding or an OT recommendation, this is the benchmark your installation will be measured against.
Height and Placement Requirements
For horizontal grab rails in accessible bathroom contexts, the generally accepted installation range is 900mm to 1100mm above the finished floor level. That said, specific heights vary depending on the fixture being supported, such as a toilet, shower, or basin, and the individual user’s assessed functional needs. An Occupational Therapist will specify exact heights based on the participant’s mobility and strength profile. No two users are identical, and a rail installed at a standard height without an OT assessment may still fall short of being genuinely useful.
Structural Substrate: The Part Most People Miss
A grab rail is only as strong as what it is fixed to. Rails must be anchored to wall studs, structural blocking, or a purpose-installed backing board rated to withstand a minimum load of 1.1kN, approximately 110kg of force. Fixing a rail into wall tiles alone will not meet this requirement and creates a serious safety risk. If the wall behind your tiles lacks adequate structure, a licensed builder will need to install appropriate backing before any rail can be compliantly fitted.
Permits, Licensing, and NDIS Obligations
Depending on the scope of work, particularly if structural wall modifications are involved, a building permit may be required. A licensed builder assesses this at the start of the project, not after the work is done. For NDIS-funded modifications, compliance with AS 1428.1 is not optional. Works must also align with any conditions outlined in the participant’s NDIS plan and OT report. Non-compliant installation can delay or affect funding approval and, more critically, put the participant at genuine physical risk. This is exactly why working with a builder who holds a Domestic Builder Unlimited licence matters; they understand both the construction requirements and the regulatory obligations that come with NDIS-funded work.
NDIS Funding for Bathroom Handrails: The Step-by-Step Process
If you are funding bathroom handrails through the NDIS, the process follows a clear sequence. Skipping steps or getting them out of order is one of the fastest ways to delay your approval or have a claim rejected. Here is exactly how it works.
Step 1: OT Assessment
Everything starts with an Occupational Therapist. The OT visits the home, assesses the participant’s mobility and functional capacity, and evaluates the bathroom layout in detail. From this, they produce a formal written recommendation specifying the rail type, exact placement, mounting heights, and any related modifications required. This report is not optional; it is the foundational document that drives every step that follows. Modifications are not one-size-fits-all, and a proper OT assessment ensures the installation addresses the participant’s actual needs rather than a generic solution.
Step 2: NDIS Plan Review or Funding Confirmation
Grab rails are classified as a “simple home modification” under the NDIS three-tier framework, which typically means a faster approval pathway compared to complex structural works. That said, all NDIS supports must still satisfy the “reasonable and necessary” criteria established under the National Disability Insurance Agency Act 2013. The modification must connect directly to the participant’s disability-related functional need. The OT report serves as the primary evidence during this stage, so a thorough, well-documented assessment significantly strengthens the funding confirmation process. You can find current guidance in the NDIS guide to providing home modifications.
Step 3: Engage a Licensed Builder
NDIS guidelines are explicit: all home modification works, including simple adaptations like handrail installation, must be completed by licensed and insured tradespeople. The builder reviews the OT report, confirms the scope of works, and provides a formal quote before any work begins. This is not a step to shortcut. Working with a builder who holds a Domestic Builder Unlimited licence, as Builda Group does, means the work is completed to a standard that holds up to NDIS scrutiny. Securing a qualified tradesperson can sometimes take longer than expected, so engaging your builder early is practical advice worth following. Better Rehab’s overview of OT home modifications outlines why builder engagement tied directly to the OT report is essential for compliant delivery.
Step 4: Installation and OT Sign-Off
The builder installs the handrails in accordance with the OT’s specifications and AS 1428.1 requirements, covering placement, load capacity, and fixing methods. Once complete, the OT may conduct a post-installation inspection to confirm the work matches their recommendations and meets the participant’s assessed needs. This sign-off protects both the participant and the integrity of the NDIS funding claim.
Step 5: NDIS Claim Processing
Once works are completed and documentation is in order, invoicing is processed through the participant’s NDIS plan. How this happens depends on how the plan is managed: self-managed participants claim directly; plan-managed participants have a plan manager handle payments; NDIA-managed participants have the NDIA pay registered providers directly. Having the OT report, quote, and completion confirmation all documented and ready before submission avoids unnecessary delays.
Who Should Install NDIS Bathroom Handrails in Melbourne?
The NDIS is clear on this point: all home modification works, including bathroom handrail installation, must be completed by licensed, insured tradespeople. DIY installation is not permitted under NDIS funding guidelines, and neither is using an unlicensed handyman for any funded modification. This is not a bureaucratic formality. A poorly anchored grab rail in a wet environment can cause the exact injury it was meant to prevent. The NDIS Home Modifications Guidance for Builders and Designers makes the rationale plain: safety and compliance are non-negotiable, and accountability sits with the installer.
Licensing Matters More Than Most People Realise
In Victoria, builder licences are not all equivalent. A Domestic Builder Unlimited licence is the highest residential builder licence class issued by the Victorian Building Authority. It authorises the holder to carry out structural and non-structural works across any residential scope. Handrail installation sits comfortably within that remit, but the broader licence becomes critical the moment a job escalates. What begins as a straightforward rail installation can reveal inadequate substrate behind tiles, a wall with insufficient framing for load-bearing fixings, or a shower configuration that needs reconfiguration to meet the OT’s recommendations. At that point, a minor works licence or a supplier fitting their own product is not sufficient. A licensed builder with full residential scope is the correct credential for any bathroom modification that may touch tiling, waterproofing, or structural elements.
OT Collaboration Is Not Optional
A competent NDIS builder treats the occupational therapist’s report as the starting brief, not background reading. The builder should be able to read that report, understand the participant’s specific mobility requirements, and identify any on-site conditions that could affect the recommended installation. If the site visit reveals something the OT could not have known, such as a wall that cannot accept the specified fixing or a floor fall that conflicts with the rail height, the right response is to flag it with the therapist directly and resolve it before work begins. This back-and-forth is standard practice in experienced NDIS modification delivery.
Who to Look For in Melbourne
Builda Group holds a Domestic Builder Unlimited licence and has direct experience delivering NDIS home modifications across Melbourne and surrounds, with particular depth in Melbourne’s northern suburbs. That combination, licensed building scope paired with familiarity with the NDIS modification process and OT workflows, is the practical credential worth looking for. Be cautious of suppliers who sell and install handrails but hold only a minor works licence or no building licence at all. For a straightforward rail in a sound wall, this may pass. But if the bathroom requires any structural change, substrate repair, or tiling work, their scope ends where the job gets complicated. As one Melbourne NDIS modification specialist notes, the participant’s needs rarely fit a simple template, and the builder’s credentials should match the full potential scope of the work.
Not on the NDIS? Bathroom Handrails Are Still Worth Installing
Most bathroom handrail inquiries we receive at Builda Group are not from NDIS participants. The more common scenario is an ageing homeowner who wants to stay in their home safely, an adult child preparing a parent’s bathroom before a hospital discharge, or someone recovering from hip surgery or a stroke who needs support in the shower right now. These are everyday situations affecting a large portion of Melbourne households, and none of them require an NDIS plan to act on.
For self-funded installations, the process is straightforward. There is no NDIS approval to seek, no mandatory occupational therapist sign-off, and no restriction on which licensed builder you engage. An OT assessment is still genuinely useful for confirming optimal rail placement and height, and we would recommend it as best practice, but it is not a mandatory step for self-funded work. What does remain constant, regardless of how the work is funded, is compliance with Australian Standards. AS 1428.1 requirements apply universally, so engaging a licensed builder is not optional even when government funding is not in the picture.
If you are an older Australian without an NDIS plan but looking for funding support, options do exist. The Support at Home program (which replaced Home Care Packages from November 2025) includes the Assistive Technology and Home Modifications scheme, which covers grab rails, lever tapware, non-slip materials, and related works. A builder who understands how these programmes operate can help you work through eligibility rather than leaving you to navigate it alone.
The case for acting early is hard to argue against. A 2025 systematic review of 20 studies confirmed that home modifications reduce falls, improve functional independence, and produce measurable cost savings. A bathroom fall can mean hospitalisation, rehabilitation, and a rushed scramble to modify the home before discharge, often under significant time pressure. A proactive installation avoids all of that.
Self-funded customers also tend to bundle modifications sensibly. Non-slip flooring, lever tapware, and a stepless shower entry are natural companions to handrail installation. Doing the work once, with a single licensed builder managing the full scope, avoids repeated disruption and delivers a cohesive result.
Handrails as Part of a Wider Accessible Bathroom
A handrail alone rarely makes a bathroom fully accessible. Most occupational therapists and NDIS planners approach bathroom safety as a system, identifying every point where a person is at risk and addressing them together. Installing a grab rail without looking at the floor surface, the shower entry, or the toilet height is like fixing one leak in a roof with several others. The modifications below are the ones most frequently paired with handrail installation, and for good reason.
Non-Slip Flooring
Wet area tiles with a slip rating of R9 or below are a significant fall risk in bathrooms. Australian standard AS 4586 classifies slip resistance, and many older Melbourne bathrooms still have polished or glazed tiles that fall well below the R11 rating recommended for wet shower zones. Upgrading the floor surface during the same project as handrail installation makes practical sense; the area is already being worked on, and combining trades reduces disruption and cost.
Stepless Shower Entry
A shower hob is one of the most common trip hazards in a standard bathroom. Removing it and creating a flush, stepless entry eliminates that risk entirely and opens the shower to wheelchair and mobility aid users. When this work is done alongside handrail installation, the waterproofing and tiling scope can be completed in a single mobilisation rather than two separate projects.
Shower Seats and Fold-Down Benches
For users who cannot stand safely for the full duration of a shower, a wall-mounted or fold-down seat combined with correctly positioned grab rails provides a complete solution. As noted in this professional guide to shower grab bars, rail placement on the back wall is specifically designed relative to seat height, confirming that seats and rails are planned as an integrated system, not independent additions.
Lever Tapware and Raised Toilet Suites
These two modifications are often overlooked because they seem minor, but their functional impact is significant. Lever handles require far less grip strength than round knobs, which matters for people with arthritis, reduced hand function, or limited coordination. A comfort-height toilet, typically 450 to 480mm from floor to seat, reduces the physical demand of sit-to-stand transfers considerably. Both modifications align with AS 1428.1 accessibility requirements and pair logically with handrail works already underway.
When Builda Group works on NDIS bathroom modifications or private accessibility upgrades across Melbourne, we look at the full picture. A well-designed accessible bathroom combines multiple modifications that work together, and that is the standard we hold every project to.
Getting Bathroom Handrails Right: Key Takeaways
Handrail type and placement should come from an OT assessment and a licensed builder reviewing the actual site, not from browsing a product catalogue. The two need to work together. An OT identifies the functional need; a builder confirms whether the substrate, wall framing, and space can support the solution safely.
AS 1428.1 compliance is non-negotiable for NDIS-funded works and the right benchmark for every installation regardless of funding source. Substrate anchoring and height placement are where DIY and unlicensed installs fail most often, and those failures carry real consequences.
The NDIS pathway for simple grab rail adaptions is manageable, but a licensed builder is required at the installation stage. Confirm this before engaging anyone.
If you are self-funded or planning ahead for ageing in place, you have full access to the same compliant, properly installed handrails without navigating the NDIS process at all.
Builda Group installs bathroom handrails and accessible bathroom modifications across Melbourne and surrounds. We hold a Domestic Builder Unlimited licence and carry direct NDIS modification experience. Get in touch to talk through your bathroom directly.
Conclusion
Bathroom safety does not have to be complicated or out of reach. The right handrail, installed in the correct position, can transform one of the most hazardous spaces in your home into a place of confidence and independence. From grab bars near the toilet to shower rails and fold-down supports, there is a solution to suit every need and bathroom layout. Better still, eligible NDIS participants may be able to fund installation through their plan, making quality modifications more accessible than ever.
If you or a loved one could benefit from improved bathroom safety, do not wait for an accident to prompt action. Speak with an occupational therapist, explore your NDIS funding options, and take that first step toward a safer home today. Small changes can make an extraordinary difference to daily life, dignity, and independence.