
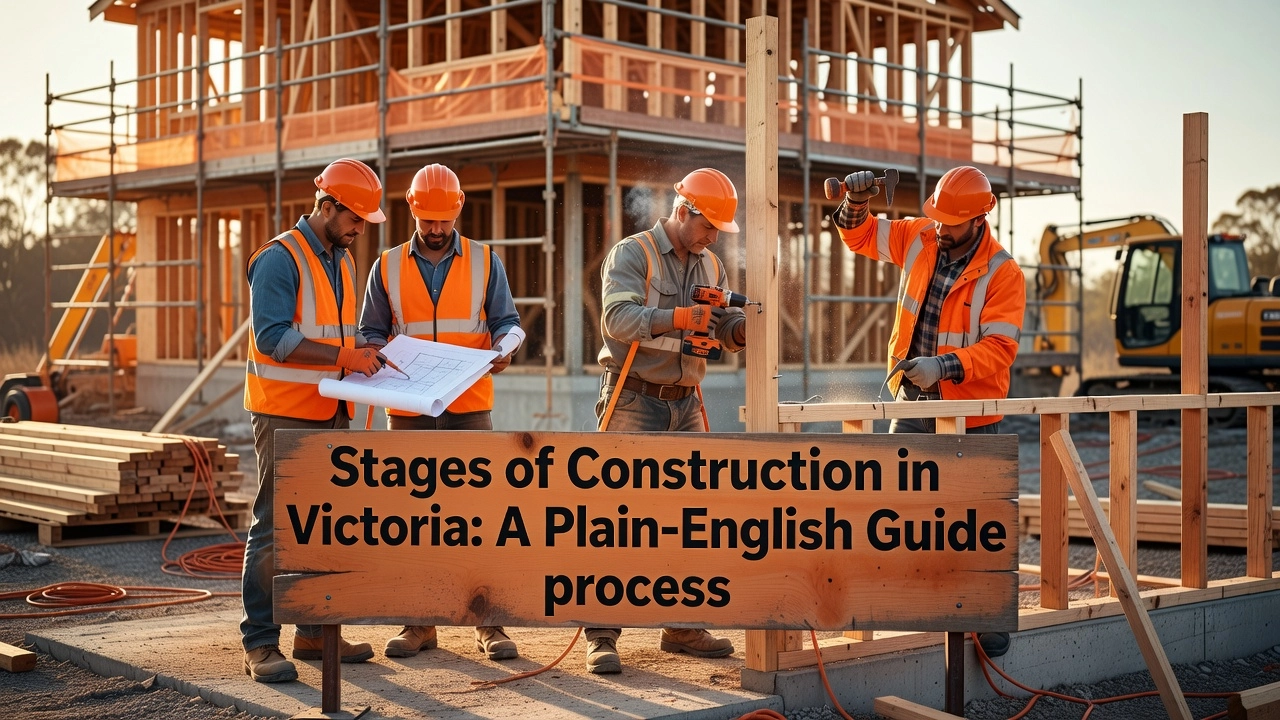
Building a home in Victoria is one of the most exciting milestones you will ever experience. But if you have never done it before, the process can feel overwhelming, confusing, and full of unfamiliar terminology. Where does everything begin? What happens after the slab goes down? And how do you know if your builder is actually on track?
Understanding the stages of construction is the single most important thing a new homeowner can learn before breaking ground. When you know what to expect at each phase, you can ask the right questions, spot potential problems early, and feel confident throughout the entire build.
This guide breaks down each stage in plain, straightforward language designed specifically for first-time builders in Victoria. No confusing jargon, no assumptions about prior knowledge. Just clear, practical information that walks you through the process from start to finish. By the end, you will have a solid understanding of how a home comes together, what your builder is doing at each milestone, and what you should be watching for along the way. Let’s get started.
Stage 1: Project Initiation
Before a single drawing is commissioned, the most important work happens in conversation. Project initiation is where scope gets defined, budgets get grounded in reality, and the right questions get asked before any money changes hands.
Budget framing starts here, not after design. Melbourne residential builds typically run between $1,800 and $3,700 per square metre for standard to mid-range construction. That range exists because no two sites are identical, and no two briefs are the same. On top of your build estimate, a 10 to 15% contingency is the standard recommended buffer. That is not padding; it is responsible planning. Costs that cannot be anticipated at this stage, such as unexpected soil conditions or late design changes, will still need to be paid. Having the contingency in place before you start means those costs do not derail the project.
Verify your builder’s licence before the conversation goes further. In Victoria, the licence class required to legally manage all domestic building work on Class 1 and Class 10 buildings is the Domestic Builder Unlimited licence. You can confirm any builder holds this directly through the Building and Plumbing Commission. Builda Group holds this licence class. It matters because it is the benchmark for scope, accountability, and legal responsibility across the full build.
For NDIS participants and Support Coordinators: funding approval timelines must be confirmed at initiation. If NDIS plan funding or a Reasonable and Necessary determination is still unresolved when design locks in, the modifications you need may no longer be practically or structurally achievable. Raise this in the first builder conversation, not at Frame stage.
For insurance repair clients: insurer scope documentation and repair authorisation belong at Stage 1. Disputes about what is covered tend to surface at Lockup or Fixing, when costs become most visible. Resolving scope before design begins prevents those disputes from halting progress mid-build.
Site-specific variables need to be on the table early. Sloped blocks require engineered footings and often retaining walls. Rocky ground drives up excavation costs significantly. Heritage overlays under Victorian planning schemes impose design constraints that affect both timeline and budget. As noted in research on the five phases of a construction project, pre-design feasibility assessment exists precisely to surface these variables before they become expensive surprises. An early conversation with a licensed builder who knows Melbourne’s sites is how you find out what your block is going to cost you before a slab is poured.
Stage 2: Planning and Design
Once project initiation is complete, the build enters its most document-intensive phase. Planning and design typically runs three to six months, covering architectural drawings, structural and engineering plans, energy assessments, and full compliance with the National Construction Code. Do not treat this phase as administrative groundwork. Every decision made here, or skipped here, flows directly into every stage that follows.
Melbourne’s Planning Overlays Are Not Optional Reading
Before any concept plan is finalised, your designer or builder needs to understand what planning controls apply to your specific site. In Melbourne and surrounds, local planning schemes layer zoning rules with overlays covering heritage controls, neighbourhood character, height limits, vegetation protection, and setback requirements. These vary not just between councils, but between zones within the same council area.
The most common and costly mistake on Victorian projects is proceeding to a developed concept without first having a pre-application discussion with the local council. That conversation takes a few weeks. Redesigning a concept that breaches an overlay takes months and costs real money. Checking what permits you need through the Victorian Building Authority is a practical starting point before engaging consultants.
Planning Permits and Building Permits Are Not the Same Thing
These two permits operate under entirely separate systems and must be sequenced correctly before site work can legally begin. A planning permit is issued by your local council. It assesses whether the proposed development is appropriate for its context, tested against zoning, overlays, overlooking, overshadowing, site coverage, and setbacks. For single dwellings, this is assessed under Clause 54 of the Victoria Planning Provisions; for multi-dwelling developments, Clause 55 applies.
A building permit is issued by a registered building surveyor, not the council. It confirms that the construction documentation complies with the National Construction Code across structural adequacy, fire safety, energy efficiency, and accessibility. The sequence is fixed: planning approval first, building permit second. Planning permit applications for straightforward sites typically take two to four months; sites with overlays or council discretion items take longer.
Unit Developments Require More Time, Not Less
If your project involves multiple dwellings or a subdivision, scope the planning and design phase accordingly. Unit developments require specialist input on subdivision design, overlooking provisions under Clause 55, site coverage ratios, and how the proposal reads against the existing streetscape. The consultant sequence is longer, involving a town planner, civil engineer, drainage engineer, and energy assessor alongside your architect and structural engineer. Each consultant’s work feeds the next. Compressing this sequence introduces real risk to your approval timeline.
Renovations and Extensions Are Held to the Same Standard
A common misconception is that renovations sit outside the formal permit process. For any structural work, they do not. Existing structure assessments shape what is physically and legally possible in the design. If your property sits within a heritage overlay, those controls govern what changes are permissible before a single design option is drawn up. The permit requirements for structural renovations and extensions are just as rigorous as a new build, and that process needs to be scoped into your timeline from the start.
Stage 3: Site Preparation
With planning and design locked in, the build shifts to physical reality. Site preparation is where the project transitions from paper to ground, and what happens here sets the structural and financial tone for everything that follows.
Clearing, Demolition, and Temporary Fencing
If there are existing structures on the site, demolition comes first. Once the site is cleared of any structures, vegetation, or debris, temporary fencing goes up immediately. In Victoria, this is not optional. Temporary fencing is a legal requirement under building regulations at the commencement of site works, designed to restrict unauthorised access and protect the public. Every licensed builder knows this. If a builder skips it or delays it, that is a compliance issue, not a cost-saving measure.
Soil Testing and Site Surveying
Once the site is cleared, soil testing and surveying begin. These results are not administrative formalities; they directly determine how your slab and footings get designed. Under Australian Standard AS 2870, soil is classified from Class A (stable, sandy) through to Class P (problem sites requiring engineered solutions). Melbourne’s clay-dominant soils frequently return reactive classifications, meaning the soil swells when wet and contracts when dry. If your site comes back as Class H2 or Class E, expect your Base stage costs to increase accordingly. Identifying this early prevents disputes later and allows your engineer to design an appropriate footing system from the start.
Service Connections
Water, sewer, electricity, and gas connections all require coordination with separate utilities providers, each with their own approval and installation timelines. These lead times can stretch weeks or longer, depending on the provider and the complexity of the connection. The coordination needs to start at this stage, not once the frame is up. Delays here flow directly into the programme.
Site Management Planning
A site management plan covers waste removal, delivery vehicle access, and the impact on neighbouring properties. This matters most on tight infill sites, which are common across Melbourne’s north and inner suburbs. In areas like Brunswick, Coburg, and Preston, blocks are constrained, rear-lane access is often limited, and adjoining properties sit close. A clear plan for where materials get delivered, where waste gets staged, and how neighbouring residents are considered is essential, not a courtesy. Understanding site preparation fundamentals reinforces why integrated planning at this stage reduces downstream disruption significantly.
Renovation Projects on Occupied Sites
For renovations on homes where residents remain living during construction, site preparation carries additional complexity. Retained structural elements, existing footings, and live utility connections all need to be identified and protected before work begins. Sequencing must account for maintaining functional access to key living areas. This takes more planning, more coordination, and more time than a vacant lot build. Factoring that in early avoids cost surprises and keeps the project on track.
Stage 4: Base (Slab)
The Base stage is widely regarded as the most critical point in the entire construction sequence. Once the concrete is poured and the slab sets, you are locked in. Altering the base after this point is not simply inconvenient; it is structurally disruptive and financially significant. Every stage that follows, from the frame to lockup to final fitout, is built directly on the decisions made here. Errors in slab height, positioning, or embedded services do not stay isolated; they compound upward through the structure and become harder and more expensive to resolve with every stage that passes.
The Mandatory Footing Inspection
Before a single cubic metre of concrete is poured, a registered building surveyor must conduct a mandatory pre-slab footing inspection. This is a legal requirement in Victoria, not an optional quality check. The inspection confirms that the footing configuration aligns with the approved engineering plans and reflects the actual conditions found on site. Standards governing this inspection include AS 2870 for residential slabs and footings, AS/NZS 4671 for steel reinforcing materials, and AS 3660.1 for termite management in new building work. If the surveyor identifies a discrepancy between the engineering drawings and what has been excavated, work must stop until it is resolved. Do not authorise the pour without written confirmation that this inspection has been completed and passed.
Method A Stage Payment 1: What You Are Actually Paying For
Under a standard Victorian staged construction contract, the Base milestone is the first formal payment drawdown. Understanding the 5 key stages of a residential build before you sign a contract matters because authorising this drawdown without verifying that the slab has been completed, inspected, and approved creates real financial and legal exposure. Before releasing funds to your lender, confirm the footing inspection is signed off, that plumbing rough-ins embedded in the slab are in place, and that the termite barrier has been installed correctly. Your lender may require a valuation at this stage; make sure the physical progress on site matches what is being claimed.
NDIS Accessibility: Decisions That Cannot Be Undone
For clients incorporating NDIS accessibility modifications, the Base stage carries additional weight. The finished slab height relative to the surrounding ground level determines threshold heights, entry configurations, and the viability of future ramp gradients throughout the home. These are not details that can be easily corrected after the pour. If the slab sits too high, ramp angles may exceed accessible design thresholds, creating compliance problems and costly remediation works later. These integration points need to be embedded in the engineering drawings before site work begins, and then verified at the footing inspection stage. This is one area where early planning coordination between your builder and an NDIS design consultant pays for itself.
Site Cost Contingencies: This Is Where They Hit
If your block is sloped, rocky, or has unexpected soil conditions, the costs associated with those variables materialise here. Deeper footings, additional excavation, rock breaking, and modified slab designs all add to the Base stage cost. This is precisely why a 10 to 15% contingency buffer is recommended from project initiation. Per current guidance on stages of building a house in Australia, site-specific variables are a recognised cost driver at this stage across the industry. If your contingency is going to be drawn on, expect it to happen now. Knowing that in advance means you are not caught off guard when the variation arrives.
Stage 5: Frame
The Frame stage is the moment a build becomes tangible. Wall frames rise, roof trusses are craned into position, and structural openings for doors and windows are locked in. For the first time, you can walk through the space and understand the scale of what you are building. Every element at this stage must align precisely with the approved architectural and engineering plans. Incorrect stud spacing, misplaced openings, or wrong header sizes cannot be hidden once cladding and insulation go on. What gets framed is what gets built.
The Mandatory Frame Inspection
Before a single sheet of cladding or a strip of insulation is installed, a registered building surveyor must inspect and pass the frame. This is a statutory requirement in Victoria, not a recommendation. The inspector verifies that all framing, bracing, tie-downs, and roof trusses are structurally correct and consistent with the approved documents. Construction cannot proceed past this point until the inspection is signed off. If rectification is required, the work is corrected and re-inspected before anything is concealed. There are no shortcuts here.
It is also worth noting that roof truss erection is classified as high-risk construction work by WorkSafe Victoria, requiring a Safe Work Method Statement to be prepared and held on site throughout the activity.
Finance, NDIS, and Multi-Dwelling Coordination
For clients with a construction loan, the Frame milestone triggers the second drawdown under Method A stage payments. Expect your lender to require a bank valuation before funds are released, so factor that into your programme.
For NDIS builds, wider doorway rough openings and structural backing for future grab rails must be incorporated now. Retrofitting these features after plasterboard is installed means demolishing walls and reframing. It is disruptive, expensive, and entirely avoidable when planned at this stage.
For unit developments, the Frame stage introduces genuine site complexity. Staggered inspections across multiple dwellings, overlapping framing crews, and concurrent rough-in preparation all run simultaneously. That level of coordination requires an experienced licensed builder actively managing the programme, not just supervising it. Holding a Domestic Builder Unlimited licence means the builder is legally accountable for exactly this kind of structural oversight across every dwelling on site.
With the frame passed and inspected, the build moves into Lockup, where the structure gets sealed against the weather for the first time.
Stage 6: Lockup
Lockup is the milestone that changes everything about how a site operates. External wall cladding is fixed, the roof covering is on, windows are glazed, and external doors are hung. The building envelope is fully closed. The structure is now weatherproof and, for the first time, physically secure at the end of each working day. That security matters beyond the obvious. Completed structural work is protected from rain damage, and the risk of theft from an open site drops significantly.
Why Lockup Unlocks the Interior
The practical consequence of a closed envelope is that internal trades can finally move in without weather risk. Plumbing rough-in begins, with pipe runs installed before walls are lined. Electrical rough-in follows, with conduit and cabling run through wall cavities before plasterboard goes up. Insulation is batted out across wall cavities and ceiling space. None of these trades can proceed efficiently, or safely, while the building remains exposed. Any delay at Lockup cascades directly through the entire internal fit-out schedule, which is why reaching this milestone on program matters as much as reaching it at all.
Payments, Inspections, and What to Expect
Lockup is Stage Payment 3 under the standard Method A construction payment schedule. At 20 to 35 percent of the contract value, it is typically the largest single drawdown to date. Cumulatively, by the time Lockup payment clears, around 50 to 70 percent of total contract funds will have been disbursed. For clients on construction loans, this drawdown usually triggers a formal bank progress inspection before funds are released. Victorian clients should also confirm current payment cap requirements under the Domestic Building Contracts Amendment Bill 2025, which passed in September 2025 and updated deposit and payment rules for building work. The Victorian Government’s guidance on deposits and payments is the right place to verify current obligations.
Insurance Repairs and Sign-Off at Lockup
For insurance repair projects, Lockup is frequently the formal checkpoint at which insurers require verified sign-off on completed structural work before authorising the internal fit-out scope. This is not a formality to manage last minute. When documentation has been maintained correctly from project initiation, including inspection records, stage certificates, and photographic evidence, this sign-off is straightforward. When it has not, it becomes a source of delay that holds up the entire remaining scope.
Double-Storey Builds Add Complexity Here
With smaller Melbourne lots driving demand for double-storey designs, Lockup carries additional technical weight on two-level builds. Achieving a fully weatherproof envelope across both levels simultaneously requires careful sequencing. Upper-level floor penetrations and balcony junctions are specific waterproofing risk points that need close attention before Lockup is called complete. Staircase structural integration, including the structural opening and trimmer beams, must also be finalised at this stage. A builder holding a Domestic Builder Unlimited licence, like Builda Group, is equipped to manage this complexity across all stages of construction on any residential build.
Stage 7: Fixing
The Fixing stage is where the build stops looking like a construction site and starts looking like a home. Plasterboard goes up across walls and ceilings, cabinetry is installed in kitchens and bathrooms, and the finishing details follow: architraves, skirting boards, tiling, bathroom fixtures, and door hardware. For many clients, this is the stage they have been waiting for, because for the first time they can walk through the space and genuinely picture living in it. The visual transformation is significant, but what matters most is what happened before the walls were closed.
Rough-In Inspections Before Wall Closure
Before any plasterboard is fixed, all concealed plumbing and electrical rough-in work must be inspected and tested. Every pipe, wire, and conduit gets its last visible moment before it disappears behind the wall lining permanently. Once the plasterboard is up, accessing those services means cutting holes, patching, repainting, and in some cases retiling. That is why rough-in inspections are not a formality; they are the final checkpoint before changes become destructive and expensive. If something is wrong behind the wall, the time to find it is before the Fixing stage begins, not after.
Payment Milestone and Scope Tracking
The Fixing milestone is Stage Payment 4 under Method A construction contracts. By the time this drawdown is reached, the majority of the total build cost has already been paid out across the previous three milestones. That makes this a critical point to review progress carefully against your original scope and contract documentation. Any variations or scope creep that have accumulated through earlier stages will be reflected in costs by now, so clients should be reconciling their contract against actual progress before authorising this payment.
Renovation and Extension Complexity
For renovation and extension projects, the Fixing stage is more involved than on a new build. Internal fit-out work must integrate seamlessly with the retained structure, which means matching existing floor levels, aligning ceiling heights, and connecting new service runs to existing plumbing and electrical without compromising either. A mismatch in floor height between old and new sections, for example, creates costly remediation work. This sequencing complexity is one reason residential construction workflows for alterations and additions require more detailed planning than a straightforward new build.
NDIS Builds: Get the Specifications Right Early
For NDIS builds, the Fixing stage is when accessible features are physically installed: lever-style door handles, accessible tapware, reinforced shower bases rated for shower chair use, and cabinetry at heights that suit wheelchair access. These are not interchangeable with standard fittings; they require specific rough-in preparation that should have been locked in at the Design stage. If an accessible feature was not specified early enough to inform the rough-in, changes at Fixing can trigger significant rework costs. For anyone building under NDIS funding, the message is straightforward: get every accessibility requirement documented before the slab is poured, not during fit-out.
Stage 8: Practical Completion and Handover
Practical completion is not a casual phrase. Under the Domestic Building Contracts Act 1995 (Vic), it carries a precise legal meaning: the building is complete except for minor defects that do not prevent it from being used for its intended purpose. It does not mean the build is perfect. It does not mean every cosmetic detail meets your personal expectations. Understanding this distinction before you reach handover will save you significant frustration and protect you from making decisions that could put you in breach of contract.
The Occupancy Permit
Before you can legally move in, a registered building surveyor conducts a final inspection to confirm the works comply with both the approved plans and the National Construction Code. This surveyor is independent. They are not representing the builder. Their role is objective confirmation that the structure meets code requirements, and their sign-off results in the issue of an Occupancy Permit. Without that permit, the building cannot be legally occupied. This step is a formal gatekeeping function, separate entirely from your own assessment of the finish quality.
The Defects List and Your Legal Protections
If outstanding items are identified at handover, a defects list is compiled. The builder is legally obligated to rectify listed defects within the timeframes set out in the contract. Document everything at your handover inspection: photographs, written notes, dates. This is not about being difficult; it is about using the correct process. The defects list is the formal mechanism that gives you recourse after the final payment has been made. Use it.
That final payment, Method A Stage Payment 5, is released upon practical completion, not upon your personal satisfaction with the finish. This is widely misunderstood. Withholding payment over minor or cosmetic dissatisfaction, rather than genuine contractual defects, can place you in breach. For a clear breakdown of how substantial completion triggers payment obligations and risk transfer, the distinction between payment and rectification is fundamental.
Statutory Warranties Post-Handover
Handover is not the end of your builder’s obligations. Victorian law implies non-excludable warranties into every domestic building contract. Structural defects are covered for ten years post-handover. Non-structural defects are covered for two years. These warranties cannot be contracted away. Any clause attempting to remove your rights against the builder is void. The warranties also extend to future owners of the property, not only the original client.
At handover, ensure you receive your Occupancy Permit, certificates of compliance for electrical and plumbing works, appliance warranties and manuals, and a copy of the approved plans. Also confirm your home and contents insurance is in place before you take possession, as construction insurance obligations shift at practical completion. Your builder’s responsibilities continue beyond the handover inspection, and knowing your rights under the Domestic Building Contracts Act is the most practical tool you have.
How Method A Stage Payments Work in Victoria
Method A is the legislated default payment structure for Victorian residential building contracts, governed by the Domestic Building Contracts Act. It divides the total contract price into six milestone-linked drawdowns: Deposit, Base, Frame, Lockup, Fixing, and Completion. Each payment is triggered by demonstrable construction progress, not by the passing of time. You do not pay simply because a few weeks have elapsed. You pay because a defined stage of work has been completed.
The percentage breakdown across those stages is not equal, and understanding the proportions matters for cash flow planning. The standard split looks like this:
- Deposit: 5%
- Base: 10%
- Frame: 15%
- Lockup: 35%
- Fixing: 25%
- Completion: 10%
Lockup is the single largest drawdown at 35% of the total contract price. Combined with Fixing at 25%, those two stages alone account for 60% of your total build cost. Knowing this in advance allows you to plan drawdowns without being caught short at the most financially intensive part of the build.
For clients using a construction loan, the link between milestone completion and bank drawdowns is direct and consequential. Lenders release funds progressively, following a progress inspection at each stage. The builder’s timeline governs when your lender disburses funds. A delay at Frame does not just slow construction; it pushes your entire drawdown schedule back and extends the period during which you are paying interest on an outstanding balance.
This structure exists to protect both sides of the contract. As Master Builders Victoria highlights, progress payments are a fundamental principle of domestic building contract management. Clients are not pre-funding work that has not started. Builders are not carrying the full financial burden of a project until the end. Before you sign any residential building contract in Victoria, read the stage payment schedule carefully, confirm the percentage allocations match the standard Method A structure, and check that stage completion definitions are clearly written, not ambiguous.
Mandatory Building Inspections at Each Stage in Victoria
Victorian law does not treat building inspections as a courtesy. Under the Building Act 1993, construction cannot legally proceed past designated inspection points until a registered building surveyor has formally signed off on each stage. These are mandatory notification stages, and bypassing them is not a grey area. It exposes a project to serious legal and financial consequences, including costly rectification orders or, in the worst cases, demolition of non-compliant work.
The four key mandatory inspection points for residential construction in Victoria are:
- Footing inspection (Base stage): conducted before concrete is poured for footings
- Frame inspection (Frame stage): conducted before wall frames and roof structure are covered
- Pre-plaster inspection (Fixing stage): conducted before plasterboard is fixed to walls and ceilings
- Final inspection (Practical Completion): conducted before an Occupancy Permit is issued
Each of these checkpoints aligns directly with the construction stages covered earlier in this guide, which is not coincidental. The payment milestones, the construction sequence, and the inspection framework are all structured around the same logic: progress must be verified before it is locked in.
As a client, you have the right to be present at each inspection and to receive copies of the inspection reports. This is worth exercising. You do not need to interpret engineering drawings or understand the National Construction Code to benefit from attending. Being on site when the surveyor signs off on the frame or pre-plaster stage gives you a direct, informed view of where your project stands at that moment.
The registered building surveyor is appointed at the start of the project and operates independently of the builder. Their obligation is to verify that the work complies with the approved plans and the National Construction Code. They are not there to advocate for the builder or for the owner. Their sign-off is the objective checkpoint that protects both parties.
If a stage fails inspection, rectification is required before the surveyor will approve progress. This is where builder management discipline matters directly to your timeline. A builder who tracks inspection readiness and prepares for each stage proactively avoids the delays that come with reactive problem-solving after a failed sign-off.
How Construction Stages Differ for Renovations and Extensions
Renovations and extensions follow their own logic. The standard new-build sequence covered in the stages above assumes a vacant site and a linear progression from ground up. When an existing structure is already standing, that sequence gets rewritten from the first day on site.
Instead of site clearing and slab work, a renovation begins with a detailed assessment: what stays, what gets demolished, and what gets modified. Selective demolition is its own distinct phase, and in homes built before 1990, a hazardous materials survey must be completed before any walls are opened. This is not optional. It reshapes the entire project sequence before a single trade is booked.
Staged occupation adds a layer of complexity that vacant-lot builds never face. Many renovation clients live in the home throughout the works. That means trades must be sequenced to preserve functional zones, whether that is a working bathroom, a temporary kitchen, or safe access to bedrooms. A builder experienced in occupied-home projects manages scheduling differently from a greenfield site. The tolerance for disruption is lower, communication needs to be tighter, and the programme has to flex around real people living in a real home.
Permits are not optional because a project is a renovation. Structural changes, wet area modifications, and additions that alter a building’s footprint all trigger council permit requirements regardless of scale. The assumption that small projects fly under the radar is one of the most expensive misconceptions in residential renovation. It does not hold up.
The Fixing stage is where renovation complexity becomes most visible. Matching existing floor levels that have settled over decades, integrating with original service runs, and sourcing materials that align with retained finishes all add time and specialist knowledge. These requirements need to be priced into the estimate from the start, not discovered mid-project.
Post-construction inspections still apply. Structural and wet area work requires formal sign-off regardless of project size. Depending on scope, a final inspection may result in an Occupancy Permit or Certificate of Final Inspection before the property is considered compliant in its new configuration. Holding a Domestic Builder Unlimited licence means these obligations are understood and managed as standard, not treated as an afterthought.
NDIS Builds and Insurance Repairs: Stage-Specific Considerations
Two project types sit outside the standard residential build sequence in ways that matter: NDIS modification projects and insurance repair works. Both follow the same staged construction framework, but each carries specific timing requirements that, if missed, create real problems downstream.
NDIS Participants: Sequence Is Everything
The most common mistake in NDIS builds is treating funding approval as something to sort out alongside design rather than before it. NDIS funding confirmation must come first. Then the occupational therapist assessment. Then design incorporating the required accessibility features. Then construction. In that order.
When accessibility features get scoped after design is locked in, one of two things happens: they get value-engineered out to protect the budget, or they get retrofitted at a significant cost premium. Neither outcome serves the participant.
The construction stages each carry a closing window for NDIS-specific work:
- Base stage: Slab height and threshold access points must be determined before the concrete pour. There is no cost-effective way to fix this after the slab sets.
- Frame stage: Doorway widths for wheelchair access and structural backing for grab rails must be built into the frame. Adding backing after the frame is complete means opening walls.
- Fixing stage: Accessible fixture specifications for bathrooms, kitchens, and laundries must be locked in here. Purpose-specified fixtures cost far less than retrofitted ones.
Each of these is a one-time window. Once the stage closes, the cost of change escalates sharply.
Insurance Repairs: Get Scope Aligned at Stage 1
Insurance repair works follow the same staged sequence as any residential build. The difference is that a second party, the insurer, has an agreed scope that must stay aligned with what actually gets built. Disputes in insurance repairs typically surface at Lockup, when structural work is being signed off and discrepancies between the original scope and what is on site become visible.
The fix is straightforward: rigorous scope alignment at Stage 1 (Initiation), before a single trade is engaged. A licensed builder managing insurance repairs should maintain stage-by-stage documentation that tracks against both the insurer’s scope and the building surveyor’s inspection reports. Without this, scope creep and dispute risk compound across every subsequent stage.
Builda Group holds a Domestic Builder Unlimited licence and applies the same staged construction framework to NDIS modification projects and insurance repair works as it does to new builds and renovations. The process does not change based on who is funding the project.
Construction Stage Timeline at a Glance
Use the table and notes below as a working reference across the full project. Every figure shown reflects typical Melbourne residential builds; your actual programme will vary based on site conditions, council type, and project scope.
| Stage | Typical Duration | Method A Payment Milestone | Mandatory Inspection Point | What You Should Be Doing |
|---|---|---|---|---|
| 1. Initiation | 2–6 weeks | Deposit (~5%) | Soil test, title search | Confirm budget, review contract, verify licence |
| 2. Planning and Design | 3–6 months | None | Design sign-off, permit issue | Review drawings thoroughly; approve selections |
| 3. Site Preparation | 1–2 weeks | None | Pre-construction site check | Confirm site access, temporary fencing in place |
| 4. Base (Slab) | 1–3 weeks | Base milestone (10%) | Pre-slab inspection before pour | Attend inspection; verify dimensions against plans |
| 5. Frame | 2–4 weeks | Frame milestone (15%) | Frame inspection before lockup | Commission independent frame check |
| 6. Lockup | 2–4 weeks | Lockup milestone (35%) | Lockup inspection | Verify weatherproofing, windows, and door placement |
| 7. Fixing | 4–8 weeks | Fixing milestone (25%) | Pre-plaster inspection | Check rough-in services before plasterboard closes |
| 8. Practical Completion | 2–4 weeks | Final payment (10%) | Final inspection and handover | Document every defect in writing at your PCI walkthrough |
For a standard Melbourne home, the active build (Stages 3 through 8) typically runs six to twelve months depending on build size and site conditions. Planning and Design alone runs three to six months before ground is broken.
What most clients underestimate is how much of the total timeline sits in the pre-construction phases. Initiation and Design together often consume as much time as the physical build. Delays in finalising drawings, council approvals, or engineering reports push the site start date back directly, with no way to recover that time once it is lost.
Double-storey and unit development builds extend the Frame through Lockup window further. Additional structural engineering sign-offs, staggered inspections across multiple dwellings, and more complex trade sequencing all add weeks to this portion of the programme.
This table is a practical reference, not a contractual commitment. Every site is different. A licensed builder holding a Domestic Builder Unlimited licence should provide a project-specific programme at the start of works, one that reflects your actual site, scope, and approval pathway.
What Knowing the Stages Actually Gets You
Reading through every stage covered above gives you something practical: you stop being a passive observer on your own project. You know what is coming, you understand what each milestone means financially and legally, and you can hold a real conversation with your builder instead of just waiting for updates.
The decisions that shape the entire build happen in the first two stages. Scope, design, licensing, accessibility requirements, and insurance scoping locked in early cost a fraction of what changes cost once concrete is poured or frames are up. That is not a general caution; it is the single most consistent finding across residential construction projects of every size.
Builda Group holds a Domestic Builder Unlimited licence and manages every stage of construction across new homes, renovations, extensions, unit developments, NDIS builds, and insurance repairs throughout Melbourne and surrounds. One licence, one point of accountability, from initiation through to handover.
If you are starting fresh or trying to locate yourself in a project already underway, the most useful next step is a direct conversation about where you are and what comes next. Not a quote form. Just a straightforward discussion.
Conclusion
Building a home in Victoria does not have to feel overwhelming. Now that you understand the key stages of construction, from the initial slab pour through to practical completion, you are far better equipped to manage the process with confidence. You know what questions to ask, what to look for at each progress inspection, and how to hold your builder accountable every step of the way.
Knowledge truly is your greatest asset throughout this journey. First-time builders who understand the process catch problems earlier, communicate more effectively, and enjoy a far smoother experience overall.
Ready to take the next step? Download our free construction stage checklist to keep track of your build from day one, or speak with one of our experienced consultants today. Your dream home is closer than you think. Start your journey informed, prepared, and excited.